DIY Guide: How to Build a Seamless Cyc Wall for Your Studio
Learn how to build a cyc wall with this comprehensive 14-step guide.
A cyclorama wall, commonly referred to as a cyc wall, is an essential component for professional photography and videography. It creates a seamless background, eliminating harsh corners and shadows, which allows for better lighting control and a cleaner aesthetic. Whether you’re a photographer, filmmaker, or content creator, having a cyc wall in your studio enhances production quality and opens up creative possibilities.
While professional cyc walls can be expensive, building your own is a cost-effective solution. With the right materials, tools, and techniques, you can create a seamless curved background that rivals professional installations. This DIY guide will walk you through the entire process, from planning and material selection to construction, finishing, and maintenance.
By the end of this guide, you’ll have the knowledge to construct a cyc wall that enhances your studio and provides professional-grade results.
Step 1: Planning Your Cyc Wall
Before starting construction, you need a well-thought-out plan to ensure your cyc wall fits your space and meets your needs. Here’s what you need to consider:
Selecting the right location for your cyc wall is crucial for achieving a functional and professional studio space. Consider the following factors:
Space Availability: Ensure there is ample room for both the cyc wall and the necessary lighting setups, camera placements, and subject movement. Take into account the workflow requirements of your studio.
Ceiling Height: A taller ceiling (at least 10 feet or more) is ideal as it allows for better light distribution and a broader range of camera angles. If your ceiling is lower, consider using soft, diffused lighting to reduce shadows.
Wall and Floor Conditions: The location should have a flat, structurally sound wall and floor to facilitate a seamless construction process. Uneven walls or floors may require leveling adjustments before installation.
Power Outlets and Accessibility: Ensure that power sources are within reach to accommodate studio lights, cameras, and other equipment. It’s also beneficial to position the cyc wall near entry points for easy access and equipment transport.
Ventilation and Climate Control: If you use high-powered studio lighting, ensure the space has proper ventilation or air conditioning to prevent overheating during extended shoots.
Determining the Size and Curve Radius
Your cyc wall should be tailored to your studio dimensions and project requirements. The size and curve radius play a significant role in achieving a professional, seamless look.
Width: For small home studios, an 8- to 12-foot-wide cyc wall is typically sufficient. Larger commercial studios may require 20 feet or more to accommodate group shots and dynamic scenes.
Height: The standard height ranges from 8 to 10 feet, but taller cyc walls (12 feet or more) provide additional flexibility for various shooting angles.
Curve Radius: The transition between the wall and the floor should be gradual and smooth to eliminate visible lines or edges.
A 12-inch radius is suitable for smaller setups.
A 24-inch or larger radius is preferred for professional studios where eliminating shadows is critical.
Depth of the Floor Extension: Extend the floor of the cyc wall by 4 to 8 feet to allow for more versatile camera angles and subject movement.
Lighting Setup: Plan your lighting in advance to ensure proper placement of ceiling-mounted or floor-based lights.
Studio Use Case: Determine whether the cyc wall will be used for green screen (chroma key), product photography, portrait sessions, or large-scale video production.
Mobility vs. Permanent Installation: If flexibility is needed, consider modular cyc walls that can be reassembled or relocated.
Step 2: Gathering Materials and Tools
This step involves selecting high-quality materials like plywood, MDF, flexible hardboard, and joint compound to create a durable and smooth surface. You'll also need the proper tools, including a saw, drill, level, sander, and paint rollers, to assemble and finish your cyc wall with precision. Proper preparation at this stage will streamline the building process and help you achieve a flawless, professional-grade studio backdrop.
Essential Materials
To construct a durable cyc wall, you’ll need the following:
Plywood or MDF boards (for the main structure): Provides a solid and stable surface for the cyc wall, ensuring durability and long-term use.
2x4 framing lumber (for support): Used to construct a sturdy frame that anchors the cyc wall securely to the existing walls and floor.
Flexible hardboard or Masonite (to create the smooth curve): A bendable material ideal for forming the seamless transition between the floor and vertical wall.
Joint compound and drywall tape (for seamless blending): Used to cover seams, screw holes, and other imperfections to create a flawlessly smooth finish.
Sandpaper (for smoothing surfaces): Essential for refining joint compound application and achieving a perfectly seamless look.
Screws, nails, and construction adhesive (for securing materials): Ensures all components remain firmly in place for long-term stability.
High-quality paint (flat white or chroma key green): A non-reflective finish that eliminates glare, making it ideal for professional video and photography work.
Tools Needed
Measuring tape and T-square (for accurate dimensions): Ensures precise alignment and measurements for a symmetrical and professional result.
Saw (circular or jigsaw) (for cutting materials): Allows for smooth, precise cuts to shape plywood, MDF, and framing lumber to fit the desired wall structure.
Drill and screws (for assembling the frame): Ensures a secure connection between the frame components and the structural integrity of the wall.
Level (to ensure a straight and even structure): Prevents misalignment and ensures the wall and floor extension are completely straight.
Sander (for a smooth finish): Helps refine the joint compound and sand any rough areas before priming and painting.
Paint rollers and brushes (for applying primer and paint): Ensures an even, professional application of primer and final paint coats.
Stud finder (for securing the frame to existing walls): Helps identify studs for securely attaching the cyc wall frame to prevent movement or instability.
Clamps and C-clamps (to hold materials in place): Useful when securing curved Masonite panels and other components during installation.
Utility knife and putty knife (for joint compound application): Helps achieve precision when applying and smoothing the joint compound over seams and screws.
Safety gear (gloves, goggles, and dust mask): Protects against wood dust, sharp materials, and airborne particles during sanding and construction.
Step 3: Building the Cyc Wall Structure
This step focuses on constructing the frame, floor extension, and seamless curve (cove) to create a sturdy and professional cyc wall. You'll begin by measuring and marking the designated area, then building and securing a strong frame using 2x4 lumber. Next, you'll attach plywood or MDF panels for the main structure and use flexible hardboard or Masonite to form a smooth curve between the wall and floor, eliminating harsh edges. Proper reinforcement and alignment at this stage ensure a stable, long-lasting cyc wall that serves as a flawless backdrop for your studio projects.
Framing the Wall and Floor Extension
Measure and Mark: Use a T-square and level to mark the area where your cyc wall will be built. Ensure that all dimensions are accurate to maintain a seamless final product.
Construct the Frame: Build a sturdy frame using 2x4 lumber, forming a rectangular structure for both the wall and floor extension. Secure the pieces together using screws and wood glue for added durability.
Secure the Frame: Attach the frame to the existing wall and floor using screws and construction adhesive. Use a level to ensure the frame is properly aligned and free from any warping or uneven edges.
Reinforce the Structure: Add cross-braces to strengthen the frame and prevent any shifting over time. This step is especially crucial for larger cyc walls that need extra support.
Creating the Curve (Cove) for Seamlessness
Attach Plywood to the Frame: Use plywood or MDF for the vertical surface. Secure the panels to the frame using screws, ensuring a flush and even surface.
Form the Cove:
Cut flexible hardboard or Masonite to the desired curve dimensions.
To create the curve, pre-bend the Masonite by gradually shaping it over a large rounded object or by dampening it slightly to increase flexibility.
Attach one edge of the Masonite to the floor frame and the other to the wall frame, forming a smooth cove transition.
Secure the Curve:
Fasten the material using screws, nails, and construction adhesive, ensuring it is firmly in place.
Reinforce the edges with wood trim or small bracing pieces to maintain the shape.
Smooth Out the Seams: Apply a layer of joint compound along the seams where the cove meets the vertical and horizontal surfaces. Sand it down once dry for a flawless, continuous transition.
This step focuses on achieving a seamless, professional finish for your cyc wall. You'll apply joint compound and drywall tape to cover seams, screw holes, and imperfections, then sand the surface for a perfectly smooth transition.
Applying Joint Compound and Sanding
Apply Joint Compound: Using a putty knife, spread a thin layer of joint compound over the seams, screw holes, and any imperfections to create a smooth transition between surfaces.
Layering and Drying: Apply multiple thin layers, allowing each layer to dry completely before adding the next to prevent cracking.
Sand the Surface: Once the final layer of joint compound is dry, use fine-grit sandpaper (120-220 grit) to sand down any rough areas until the surface is flawless and seamless.
Check for Imperfections: Run your hand over the surface to feel for any bumps or uneven sections and sand accordingly.
Apply Primer: Use a high-quality, water-based primer to prepare the surface for painting. This ensures better paint adhesion and prevents previous materials from showing through.
Choose the Right Paint: Select a matte, non-reflective paint to avoid glare in photography and video work.
Flat white paint is ideal for general studio use.
Chroma key green is recommended if you plan to use the cyc wall for green screen work.
Apply Multiple Coats:
Start with an even first coat, using a high-density foam roller or a paint sprayer for the smoothest application.
Let the first coat dry completely before applying additional layers.
Apply at least two to three coats to achieve a consistent and professional finish.
Final Touches:
Inspect the wall under different lighting conditions to check for streaks or uneven paint application.
If necessary, lightly sand between coats for the smoothest results.
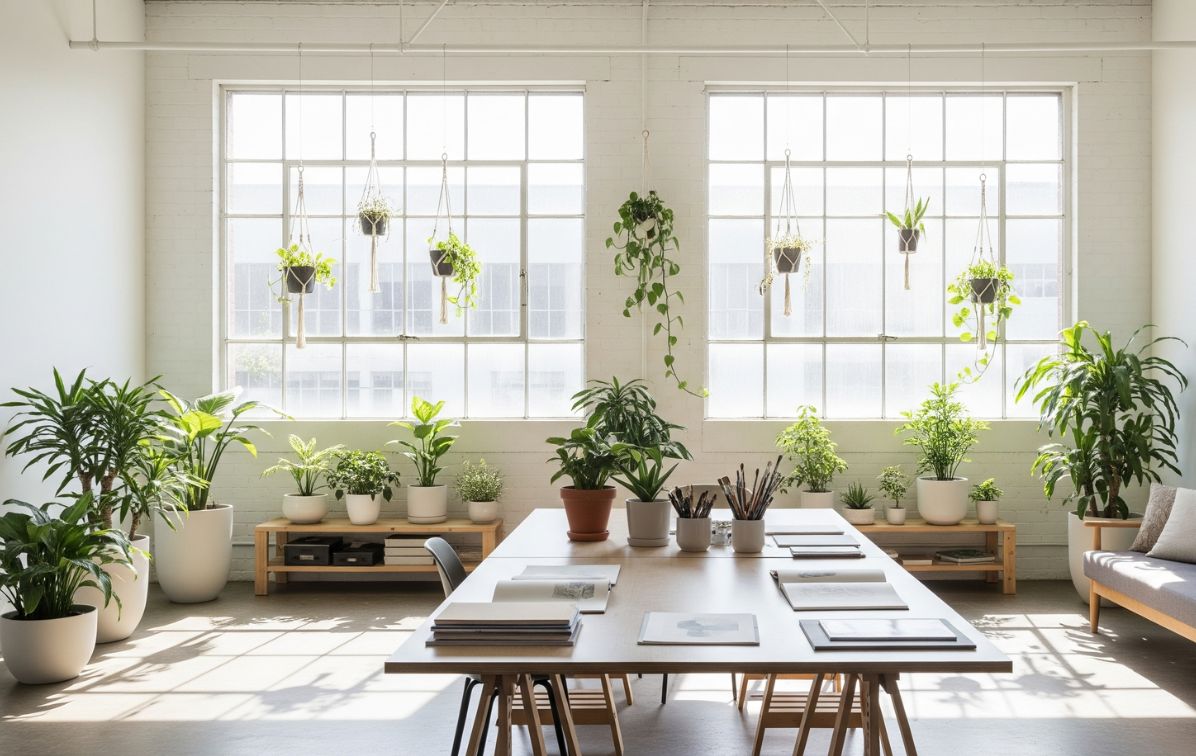
Once your cyc wall is built, it's time to enhance your studio space to maximize its functionality and appeal. This step involves strategically organizing lighting, props, and equipment to maintain a clutter-free workspace.
A. Consider Lighting Requirements
Proper lighting enhances the functionality of your cyc wall. Here’s how to ensure even coverage and minimize shadows:
Install a Ceiling-Mounted Lighting Grid
A lighting grid provides uniform illumination across the cyc wall.
Position soft, diffused lights to avoid harsh shadows and create an even tone.
Consider LED panels or fluorescent fixtures for consistent brightness without excessive heat.
Use Floor-Based Light Stands
Floor-based stands offer flexibility in positioning lights at various angles.
Use adjustable height stands to direct light effectively for different shots.
Keep lights positioned outside the frame to avoid unwanted reflections and glare.
Prevent Shadows and Uneven Lighting
Use bounce reflectors or light diffusers to soften lighting and eliminate hard shadows.
Maintain a balanced three-point lighting setup to highlight the subject without causing unwanted contrasts.
Adjust light intensity and positioning based on the project’s needs for optimal results.
Think about how your cyc wall will be used and add features to enhance its versatility:
Soundproofing for Audio Recording
If your studio will be used for video production with sound, consider installing soundproofing panels around the cyc wall.
Use acoustic foam or sound-absorbing materials to minimize echoes and external noise interference.
Seal any gaps or openings to prevent unwanted noise from entering the recording area.
Managing Heat from Lighting
Tungsten lights and other high-powered lighting equipment generate heat, which can make long shooting sessions uncomfortable.
Install an industrial air conditioning unit or high-powered ventilation system to maintain a cool working environment.
Use LED lights instead of tungsten to reduce heat output while maintaining high-quality lighting.
Enhancing Versatility with Modular Design
Consider making parts of your cyc wall modular or detachable to allow for different setups and shooting angles.
Incorporate adjustable or retractable panels to create different background styles for various projects.
Add removable matte panels for easy repainting or switching between different colors and textures.
By customizing your cyc wall to fit your specific needs, you can maximize its functionality and ensure that your studio meets the demands of various creative projects.
Enhance your studio’s functionality and appeal by adding various features that cater to diverse creative needs.
Add Backdrops, Props, and Lighting Equipment
Install removable backdrops for different styles and themes.
Invest in props and staging elements to add depth and versatility to your shoots.
Upgrade your lighting setup with softboxes, LED panels, and reflectors for professional-quality results.
Create a Comfortable Lounge Area
Set up a dedicated client lounge with comfortable seating and refreshments.
Provide a workstation with charging ports for collaborators to review content in real time.
Incorporate soundproofing elements to create a quiet and focused working environment.
Offer Extra Amenities to Attract Clients
Provide a dressing and makeup area for talent and models.
Equip your studio with a refreshment station to keep clients and team members comfortable.
Include high-speed Wi-Fi and a media playback system for instant review and editing of footage.
By incorporating these elements, your studio becomes a multi-functional, client-friendly environment that appeals to a broader range of professionals and creatives.
Cyclorama walls require regular maintenance to stay in top condition. Here’s how to ensure its longevity:
Repainting the Surface
Regular use can cause scuffs, stains, and wear from shoots, so repaint as needed to maintain a seamless look.
Use high-quality matte white paint to ensure even coverage and prevent glare.
Consider keeping extra paint on hand for quick touch-ups between shoots.
Preventing Damage and Wear
Limit foot traffic on the cyc wall to avoid scuff marks and cracks.
Place protective mats or pads in high-impact areas to reduce wear.
Avoid dragging heavy equipment across the surface to prevent indentations and scratches.
Cleaning and General Upkeep
Regularly dust and wipe down the cyc wall to remove dirt and residue.
Use mild cleaning solutions to remove stains without damaging the paint.
Keep your studio organized and clutter-free to prevent unnecessary contact with the cyc wall.
By following these maintenance tips, your cyc wall will remain pristine and professional-looking for years to come, ensuring that your studio remains a high-quality production space.
Offer hourly, half-day, and full-day rental rates to maximize revenue.
Create membership or subscription plans for regular users.
Provide add-on services such as lighting equipment, cameras, and on-site assistants for an enhanced experience.
Host Paid Events, Workshops, and Training Sessions
Organize photography and videography workshops for beginners and professionals.
Collaborate with industry experts to offer specialized training programs on lighting, editing, and shooting techniques.
Host networking events and meetups to attract creatives and businesses in your area.
Offer Custom Cyc Wall Painting or Green Screen Services
Allow clients to request custom background colors or themes for specialized shoots.
Provide green screen repainting services for visual effects and chroma key projects.
Offer temporary vinyl overlays or digital projections to expand backdrop options without repainting.
By utilizing these strategies, you can turn your studio into a profitable creative hub, making your cyc wall a worthwhile investment that continues to generate revenue and opportunities.
Step 7: Maintaining and Using Your Cyc Wall
Regular maintenance is essential to preserve the seamless look and longevity of your cyc wall. This step involves routine cleaning, repainting scuffed areas, and repairing any cracks or dents caused by frequent use. Proper care ensures that your cyc wall remains pristine, professional, and ready for every shoot. Additionally, optimizing lighting and workflow will help you get the best results from your cyc wall for photography, videography, and creative projects.
A. Safety Considerations
When constructing a cyc wall, safety is paramount to avoid accidents and ensure long-term durability.
Ensure Structural Stability
Use high-quality materials for framing and support.
Securely attach the frame to the wall and floor using strong fasteners.
Regularly inspect for any shifts, cracks, or weak joints that may compromise stability.
Proper Ventilation When Working With Paint and Joint Compound
Paint and joint compound can emit harmful fumes, so work in a well-ventilated space.
Use exhaust fans or open windows to promote air circulation.
Avoid prolonged exposure to dust from sanding by cleaning up regularly.
Use Protective Gear
Wear gloves when handling materials to prevent cuts or splinters.
Use a mask or respirator to protect against inhaling paint fumes and fine dust.
Safety glasses or goggles help prevent debris from entering your eyes during sanding and drilling.
By following these safety precautions, you ensure a secure and professional cyc wall installation while minimizing health risks.
The cost of building a cyc wall typically ranges between $500 to $2,500, depending on factors such as size, materials, and additional modifications. A smaller wall with basic materials can cost around $500 to $1,000, whereas a larger, more professional-grade cyc wall with premium materials and lighting setups can exceed $2,000.
Cost-Saving Tips
Repurpose materials: Consider using reclaimed wood or leftover construction supplies to cut costs.
Buy in bulk: Purchasing paint, lumber, and drywall tape in larger quantities often reduces costs.
Source discounts: Check with local hardware stores for deals on materials or look for secondhand options.
DIY as much as possible: Hiring professionals for certain aspects, such as electrical work or structural reinforcements, can be expensive. Do as much as you can yourself to save money.
When to Hire Professionals vs. DIY
DIY: If you have basic construction skills, building the frame, applying joint compound, and painting can all be done without professional help.
Hire professionals: If your cyc wall requires complex lighting setups, structural reinforcements, or electrical work, it’s best to hire an expert to ensure safety and quality.
Consider time vs. cost: If you’re on a strict deadline, a professional team can complete the job faster, but at a higher cost.
By planning your budget carefully, sourcing cost-effective materials, and deciding when to seek professional help, you can maximize the value of your investment while keeping expenses manageable.
A portable cyc wall is ideal for multi-use studios or locations where a permanent installation isn't feasible.
Use lightweight materials such as aluminum framing and modular MDF panels for easy mobility.
Design the wall to fold or disassemble into sections for convenient storage and transport.
Incorporate locking wheels on the base for smooth repositioning while ensuring stability.
Adding Curved Corners for Immersive Backgrounds
Extending the cyc wall to wrap around corners creates a more immersive shooting environment.
Construct additional curved panels that seamlessly blend into the main cyc wall for a fully enclosed look.
Ensure corners are sanded and painted smoothly to prevent any noticeable seams or texture inconsistencies.
Customizing for Green Screen and Projection Mapping
Green screen cyc walls require chroma key paint with an even, non-reflective finish to enhance keying effects.
Install LED backlighting to help separate the subject from the background, improving green screen efficiency.
For projection mapping, use a high-contrast matte white paint to ensure clarity and reduce glare from projected visuals.
Add adjustable mounting tracks to swap between different backgrounds or backdrops for various projects.
By implementing these advanced modifications, you can make your cyc wall more versatile, professional, and functional for diverse creative applications.
Organizing Cables and Power Sources for a Clutter-Free Space
Use cable management solutions such as cable trays, clips, and Velcro straps to keep cords neat and organized.
Install floor or wall-mounted power strips to avoid tangled cables and make power sources easily accessible.
Consider wireless lighting solutions where possible to minimize cable clutter and create a more flexible workspace.
Storing Lighting and Props Efficiently
Use wall-mounted racks or shelving to store lighting stands, softboxes, and tripods when not in use.
Label and categorize props in storage bins or cabinets for quick and easy access.
Utilize portable carts to move frequently used equipment efficiently across different shooting zones.
Creating Dedicated Shooting Zones
Designate specific areas for different types of shoots, such as product photography, interviews, and full-body portraits.
Use movable dividers or curtains to section off areas for privacy and better control over lighting conditions.
Ensure each shooting zone is equipped with proper lighting, backdrops, and props to streamline production workflows.
By optimizing your studio workflow, you can increase efficiency, maintain a professional workspace, and enhance overall productivity in your creative projects.
Renting Your Studio to Photographers and Videographers
Market your cyc wall as a high-quality, professional backdrop for creative projects.
Offer hourly or daily rental rates to attract independent creators, businesses, and production companies.
Create rental packages that include lighting, props, and additional equipment to increase revenue.
Offering Custom Cyc Wall Painting for Different Backdrops
Provide custom-painted backgrounds for themed photo or video shoots.
Offer a chroma key green repainting service for clients who need a green screen setup.
Use removable backdrop solutions that allow clients to easily switch between different styles and aesthetics.
Hosting Workshops and Training Sessions
Organize photography and videography workshops to teach lighting, composition, and editing techniques.
Offer training sessions on studio workflow optimization, camera settings, and working with a cyc wall.
Partner with industry professionals to provide hands-on learning experiences and attract a wider audience.
By maximizing your studio’s business potential, you can generate additional income, build valuable industry connections, and establish your studio as a go-to creative space in your community.
FAQ
How much does it cost to build a cyc wall?
The cost varies depending on size and materials but typically ranges between $500 to $2,500.
How do I prevent visible seams on my cyc wall?
Use joint compound and drywall tape to cover seams, then sand and paint for a smooth finish.
What type of paint should I use?
A flat white paint is ideal for general use, while chroma key green is best for green screen work.
Can I build a portable cyc wall?
Yes, you can create a modular cyc wall using lightweight materials that can be disassembled when needed.
How often should I repaint my cyc wall?
Repaint as needed, typically every few months, depending on usage and wear.
How long does it take to build a cyc wall? The construction process can take anywhere from a few days to a couple of weeks, depending on the size, materials, and drying time for joint compound and paint.
Can I install a cyc wall in a small studio? Yes! Even in a small space, a compact cyc wall (8-10 feet wide) can provide a professional, seamless background for photography and videography.
What’s the best way to light a cyc wall? Use soft, even lighting from a ceiling-mounted grid or floor-based lights placed outside the frame to minimize shadows and hotspots.
How do I prevent my cyc wall from cracking over time? Ensure a strong, reinforced frame, use flexible materials for the curve, and apply multiple layers of joint compound and paint for durability.
Can I use a cyc wall for both photography and video? Absolutely! A well-lit cyc wall is perfect for both still photography and video productions, including interviews, product shoots, and commercial projects.
What should I do if my cyc wall gets dirty? Use a damp cloth or mild cleaner for minor stains. For more extensive wear, a fresh coat of paint will restore the seamless look.
Can I add a curved ceiling to my cyc wall? Yes, a curved ceiling extension can help eliminate shadows and reflections, creating an even more immersive background.
Is soundproofing necessary for a cyc wall? If you plan to use your studio for audio recording, consider adding acoustic panels or foam to reduce echo and background noise.
Conclusion
Building a seamless cyc wall is an excellent investment for any studio, enhancing production quality and offering creative versatility. With proper planning, the right materials, and regular maintenance, your DIY cyc wall will serve as a professional-grade asset for years to come.
A well-built cyc wall can increase your studio's value, attract clients and collaborators, and expand your creative possibilities. Whether you're using it for personal projects or renting it out, a seamless cyc wall is a long-term investment that elevates your production quality and professional presence.
Have Questions?
If you need more details or have specific concerns, drop a comment or reach out! Share your DIY cyc wall experience, and let’s create the best studio setups together.
Happy building!
Explore studios to rent
Find and book creative spaces for all of your content creation needs, from video production to podcasting, photo shoots, and more!

.jpg)


.jpg)